

Build your first workspace
Ta treść nie jest jeszcze dostępna w Twoim języku.
This tutorial builds a small cold-room monitor. You will create a workspace, add an editable temperature and setpoint, calculate the difference between them, and make a report. You do not need a controller or Modbus connection.
You need an Overvis HMI account with permission to create a workspace. Allow about 20 minutes.
Create the workspace
Section titled “Create the workspace”- Sign in and open the Workspaces menu in the header.
- Select Create workspace.
- Name it
Cold room tutorialand submit the form. - Open Setup, then Parameters.
The workspace is the container for its connections, parameters, dashboards, files, and reports. You are its owner because you created it.
Add a branch
Section titled “Add a branch”- Select Add, then Root branch.
- Name the branch
Cold room. - Save it.
A branch groups related parameters. It does not communicate with equipment.
Add the current temperature
Section titled “Add the current temperature”- Select Add, then Parameter.
- Choose the
Cold roombranch. - Set Name to
Temperatureand Units to°C. - Choose Constant as the source.
- Set the key to
tutorial-temperatureand allow writes. - Choose a numeric value type that accepts decimal values.
- Set Background reading period (seconds) to
10. - Save the parameter.
A constant parameter stores a value in the workspace, so it is useful for learning and for values that do not come from equipment. Give it its first value:
- Select Temperature and click Read, keeping Live off. The constant has no value yet, so the row shows Decode error and a Write value link.
- Click Write value, enter
4.5, and press Enter.
From now on, click the displayed value to change it.
Add the setpoint
Section titled “Add the setpoint”Repeat the same process with these values:
| Field | Value |
|---|---|
| Name | Setpoint |
| Units | °C |
| Source | Constant, writable |
| Key | tutorial-setpoint |
| Background reading period | 10 seconds |
Save the parameter and give it its first value the same way: select it, click Read with
Live off, click Write value in the Setpoint row, enter 3.0, and press Enter. Constant
values are written from the parameter tree after the parameter exists. The create form does not
have an initial-value field. You can enable Live afterwards to watch readings; turn it off
before editing a value.
Calculate the temperature difference
Section titled “Calculate the temperature difference”- Add another parameter to
Cold room. - Name it
Above setpointand set its units to°C. - Choose Calculated as the source.
- Add
Temperatureas input 1 andSetpointas input 2. - Enter the formula
#1 - #2and choose a floating-point result type. - Choose a compatible numeric value type, set the background reading period to
10, and save.
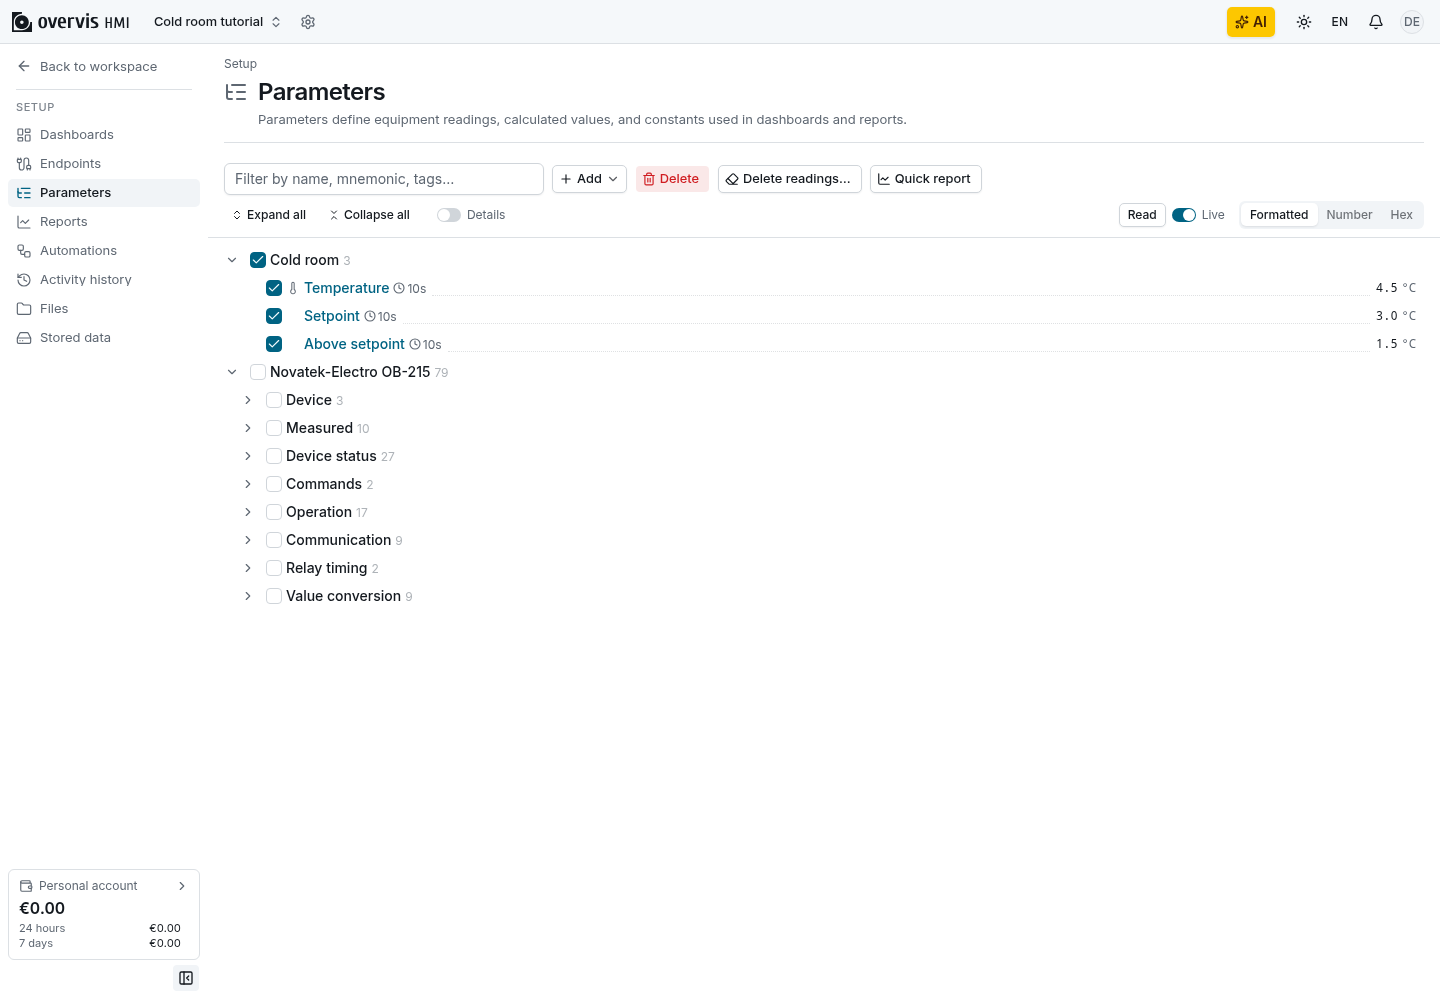
The live value should be 1.5. Change Temperature or Setpoint and confirm that the
calculated value follows it. Calculated parameters are read-only.
Create a quick report
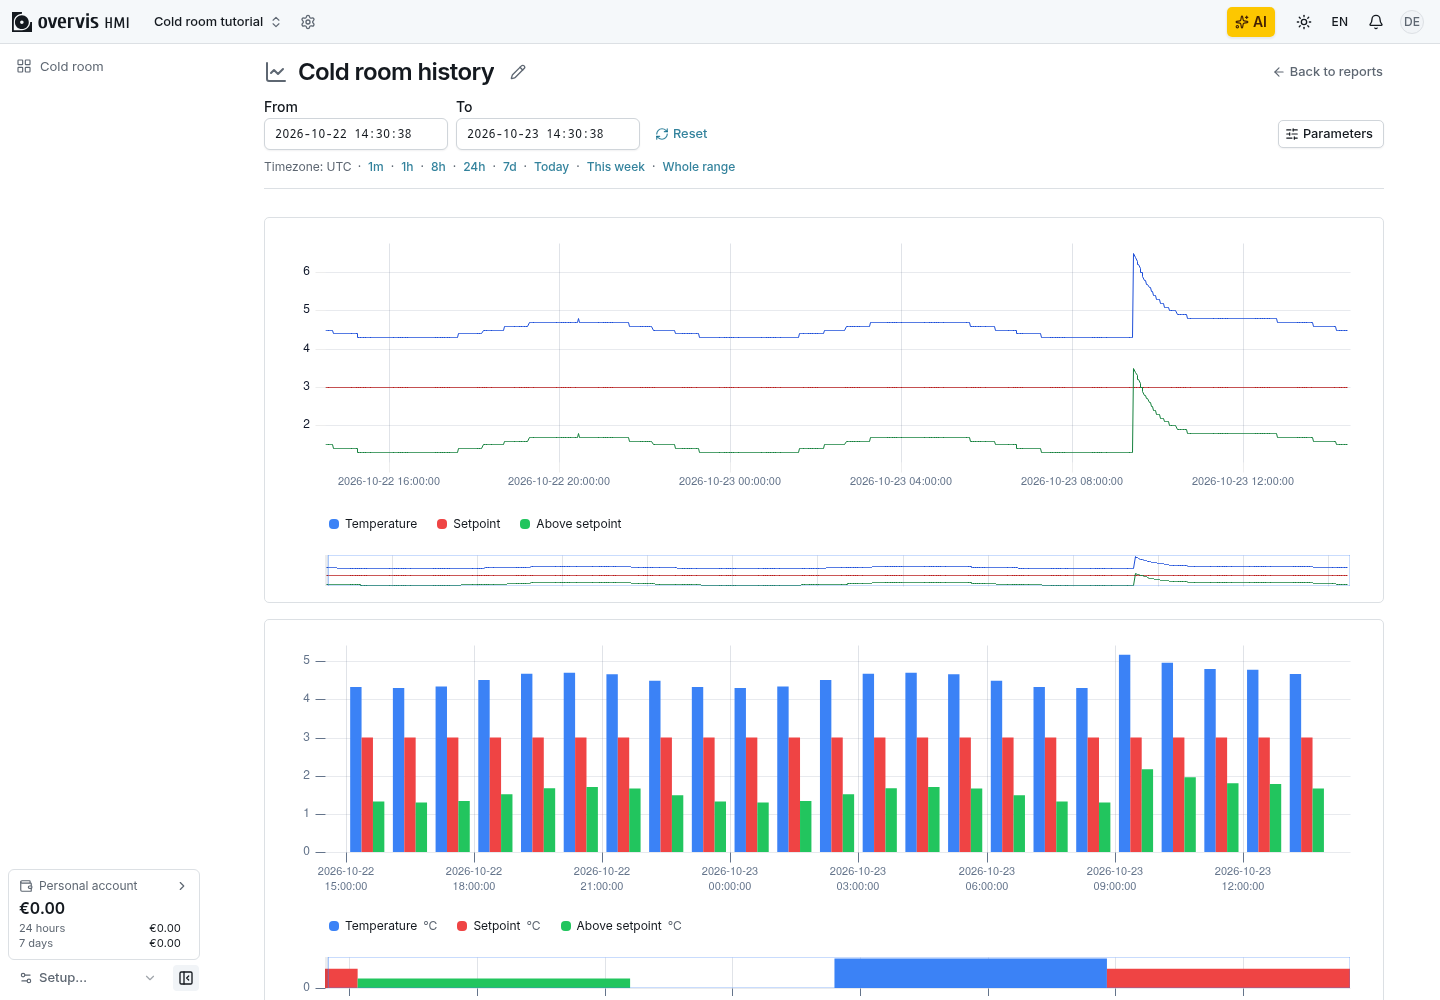
Section titled “Create a quick report”- Select
Temperature,Setpoint, andAbove setpointin the parameter tree. - Select Quick report.
- Choose a time range that includes your changes.
Wait at least 20 seconds before opening the report. Background reading runs independently of the
Live switch and stores a point every 10 seconds for these tutorial parameters. If the report is
empty, reopen each parameter and confirm its background reading period is 10 rather than empty.
You now have a working workspace whose values do not depend on equipment. Continue with Build a cold-room dashboard, or learn how parameters work.